
Preserving Greens for Winter
Today is March 1st. The cusp of spring. The garden has been resting under a blanket of snow since October, but soon enough planting will begin. I’ve been doing a lot of daydreaming about the coming garden season, putting in those final seed orders, and taking inventory of the past year’s harvests.
During our first years at the homestead, greens were sorely missed during winter months. We craved the taste of fresh plant life, eagerly awaiting the day when wild spring shoots burst from ground. When fresh food finally arrives, it is hard to eat enough of it!
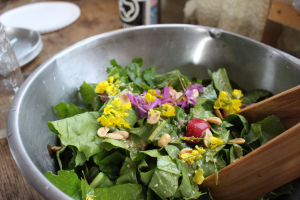
Salad Season! Use it all: Edible flowers, wild and cultivate greens, radishes, and nuts. Photo Credit: Makiko Yoshida
This is the first year that we preserved enough homegrown greens to stretch all the way into the spring months. It may have been 5 months since the garden went to bed, but garden greens are still on the table.
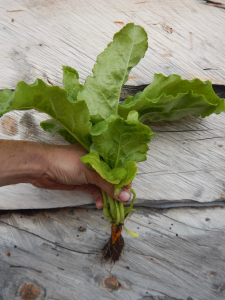
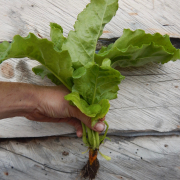
Thinned beet greens bound for the table or the freezer. Photo Credit: Margaret Stern
Over the past few years, I have been experimenting with the best ways to preserve greens. I don’t like canned greens, and while I love krauts and other fermented greens, they don’t always hit the spot. Blanching and freezing is the best method I have found to add year-round, non fermented greenery to the homestead diet.
Blanching and freezing greens is not a new concept or terribly hard. It is time consuming, but worth the effort. The finished product makes a difference when trying to eat healthfully from the garden year round. It also makes the most of your hard work from the summer. I regularly process turnip, beet, kale and chard greens. Throughout the growing season, keep the nicest greens from thinning or harvest. The ones that aren’t eaten right away can be processed for winter.

Blanched and Frozen greens for the freezer. Single servings. Photo Credit: Makiko Yoshida
Blanching and Freezing Greens
Materials:
Fresh-Hardy Greens, Cutting Board, Knife, Stock Pot of Water, Pot of Cold Water, Strainer, Containers (Ziplock bags, jars, or VacuumSealer Bags)
- Thoroughly wash your greens while bringing a pot of water to a rolling boil.
- Rough chop greens. Remove stems if desired.
- Dump greens into boiling water.
- Reheat until the water returns to a boil– If this takes more than 10 minutes, you are using too many greens.
- Once water returns to a rolling boil, keep greens in the water for 2-3 minutes.
- After 2-3 minutes, strain hot water from greens. Dump strained greens into cold water. Drain thoroughly.
- Now get all of the remaining liquid out of your greens by squeezing.
- Take the ball of greens formed by squeezing and compacting, and place in your container.
- Repeat, label container, and freeze.
In years past, I did not make the greens into single serving. That was a mistake. I ended up with huge gallon Ziplock bags that required me hacking chunks off of the solid green clumps with an axe. Squeezing and freezing the greens into single, fist sized portions works incredibly well. You don’t have to defrost an entire bag or break out the axe. About 16 fist sized serving fit into a gallon ziplock bag. I also experimented with making flat “cookie” shaped servings to fit into canning jars as a way to cut down on plastic use.
You may wonder why you can’t just throw fresh greens into the freezer and call it a day. If left uncooked, enzymatic action continues to act upon the vegetables resulting in a loss of taste, texture, and color. When blanching, the cooking is done quickly enough that the veggies don’t get mushy. They remain crisp and flavorful until you are ready to eat them.
Ways to enjoy blanched greens? Toss them in pasta, quiche, sauté before frying eggs, put in soup, stews, and anywhere you would want cooked greenery!